You don’t need to spend your Saturday morning scrubbing the “worst bits” of your cooker before I arrive at your door. It’s a common worry, but the truth is that learning how to prepare for a professional oven clean isn’t about doing the hard work yourself. It’s simply about clearing the path so I can get straight to the grit and grime whilst ensuring your home remains a safe and tidy environment.
I know it’s easy to feel a bit of “cleaner’s guilt” or get confused about whether the appliance should be hot or cold when the service starts. You want a sparkling result without any hassle, and you certainly don’t want to worry about the safety of your children or pets during the process. I’ve seen every type of spill and bake-on imaginable, so there’s no need to feel overwhelmed by the state of your kitchen.
This guide is designed to take the stress out of the process. I’ll explain exactly what you need to move, how to handle the temperature, and what you can expect from a professional service. By following these simple steps, you’ll facilitate a fast and thorough restoration that leaves your oven looking like it’s brand new.
Key Takeaways
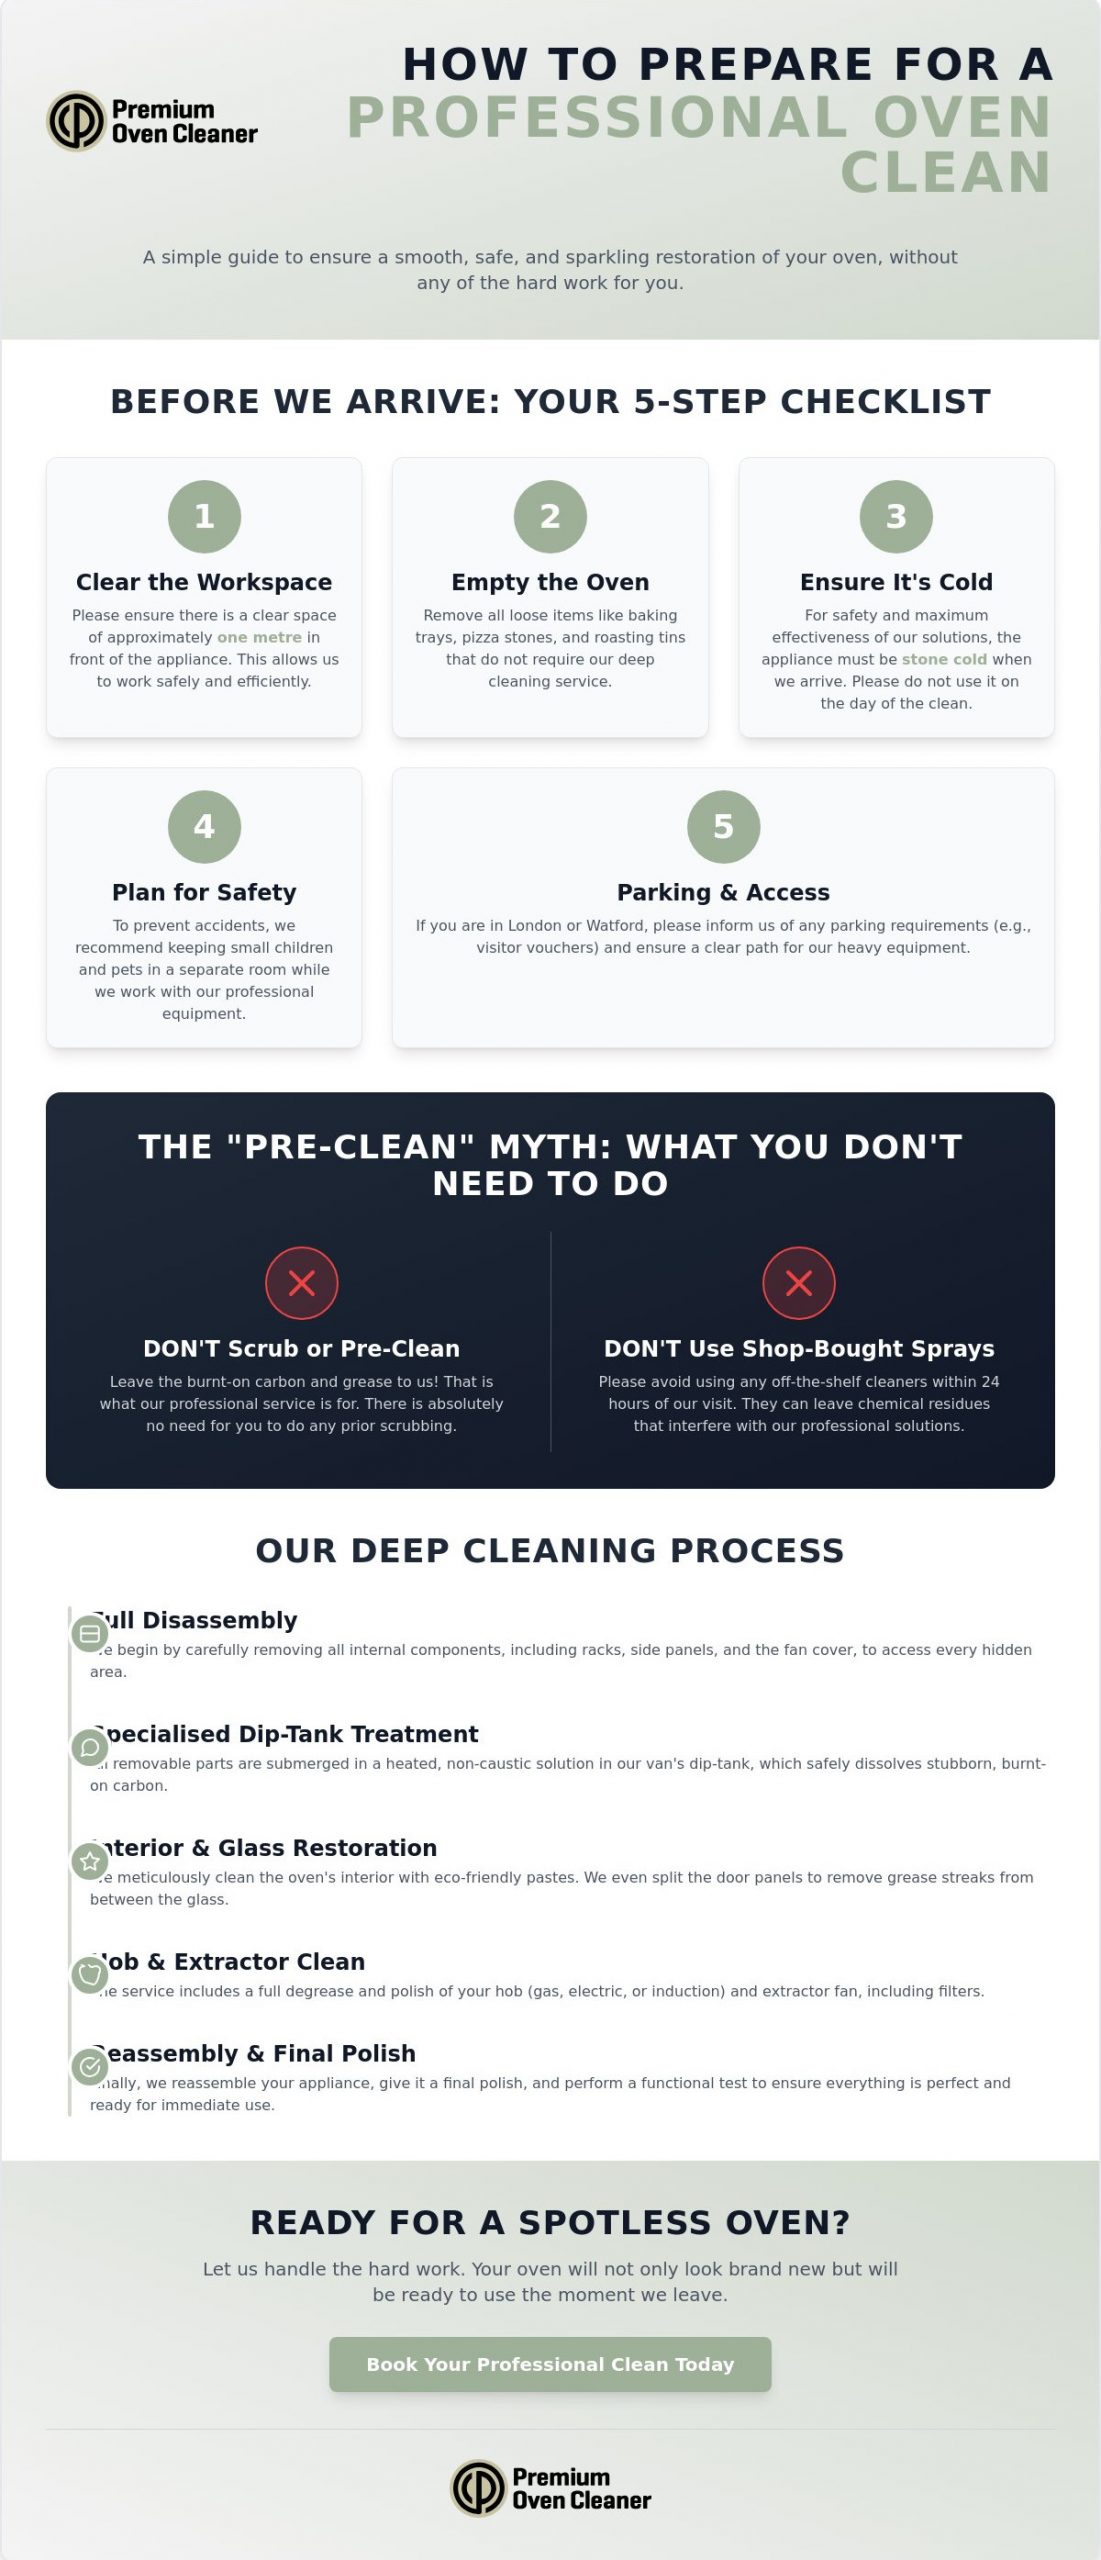
- Clear a one-metre workspace in front of your appliance to ensure I can work safely and efficiently throughout the service.
- Learn how to prepare for a professional oven clean by removing all loose trays and roasting tins that do not require a deep treatment.
- Understand the professional disassembly and dip-tank process used to restore your oven racks and panels to their original condition.
- Discover the “First Heat” protocol used to evaporate any residual moisture so you can start cooking again straight away.
- Find out why non-caustic cleaning solutions are the best choice for a family home with pets and young children.
Essential Steps to Prepare Your Kitchen for a Professional Oven Clean
When you’re looking at how to prepare for a professional oven clean, the goal is to make the process as smooth as possible for both of us. I don’t expect you to do any of the actual scrubbing, but a few simple logistical steps help me get straight to work. First, please empty the oven completely. This includes any baking trays, roasting tins, or pizza stones you usually store inside. If these items don’t require cleaning, move them to a cupboard to keep your worktops clear and clutter-free.
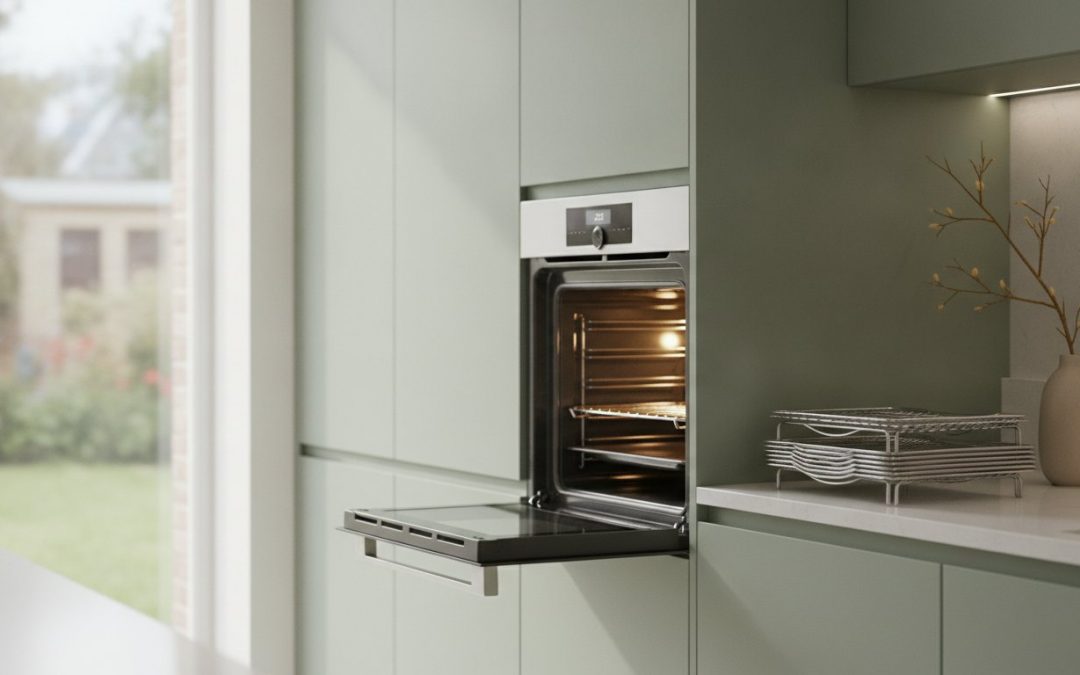
I also need a bit of room to move. Clearing a workspace of approximately one metre directly in front of the oven allows me to set up my tools and move freely without any obstructions. It’s also vital that the appliance is stone cold when I arrive. Whilst you might understand how self-cleaning ovens work by using extreme heat to incinerate grease, my professional process relies on specialist, non-caustic solutions. These are far safer and more effective when applied to a cool surface.
Finally, think about safety. My equipment and solutions are professional-grade, so I recommend keeping pets and small children in a separate room whilst I’m working. It prevents any accidental trips or curious hands from getting near the dip-tank or the open appliance.
Logistics: Parking and Access in London and Watford
If you live in a busy London borough or near the centre of Watford, parking can be tricky. Please let me know if I’ll need a visitor’s voucher or if there’s a specific spot I should use. My van carries a heavy dip-tank, so a clear path from the front door to your kitchen is a huge help. I’ll also need to identify the nearest sink or an outdoor tap to rinse certain components during the final stages of the restoration.
The “Pre-Clean” Myth: What You Don’t Need to Do
There is absolutely no need to “pre-clean” your oven. I’m completely unfazed by burnt-on carbon or years of grease; that’s exactly what you’re paying me to handle. In fact, I’d ask that you don’t use any supermarket “off-the-shelf” spray cleaners within 24 hours of my visit. These products often leave a chemical residue that can interfere with my professional solutions, potentially making the deep clean less effective.
What’s Included in a Deep Oven Clean: Understanding the Professional Process
Once I’ve set up my workspace, the real transformation begins. Understanding what happens during the service helps you see why knowing how to prepare for a professional oven clean is so beneficial. I don’t just wipe the surfaces; I perform a complete disassembly of the appliance. This involves removing the racks, side panels, and even the fan cover to reach the hidden grease that often causes smoke and unpleasant smells during cooking.
The removable parts are placed into a heated, non-caustic solution in my van’s dip-tank. This specialised bath dissolves stubborn carbon deposits whilst I focus on the oven’s interior. I use professional blades and eco-friendly pastes to lift baked-on grime, restoring the enamel to its original finish without any harsh fumes. One of the most satisfying parts of the job is cleaning between the glass panels of the oven door. I carefully take the door apart to remove those unsightly drips and grease streaks that are impossible to reach with standard household tools.
Restoring the Hob and Extractor Fan
A deep clean should cover the entire cooking station. I degrease and polish hobs, whether they are gas, electric, or induction surfaces. For gas hobs, I pay close attention to the burners and supports to ensure they are free from carbon. I also tackle the extractor fan, cleaning the filters and replacing bulbs if they’ve flickered out. If you own an AGA or a range cooker, I use a more bespoke, time-intensive approach to ensure the cast iron or large enamel surfaces are treated with the care they deserve. If you’re ready to see these results in your own kitchen, you can book your professional oven clean today and let me handle the hard work.
Final Inspection and Reassembly
After the components have soaked, I rinse and dry them before reassembling the entire unit. The final touch is a meticulous polish of the exterior stainless steel or enamel. I always finish with a functional test to ensure the fan and heating elements are working perfectly before I pack up my tools. This ensures your appliance isn’t just clean, but ready for immediate use.
After the Service: How to Maintain Your Professionally Cleaned Oven
Once I’ve finished the restoration, your kitchen will feel like a fresh start. You won’t have to wait hours to start cooking again. Since I use non-caustic, eco-friendly products, there are no toxic fumes to worry about, meaning you can typically use your appliance immediately. I do suggest following the “First Heat” protocol, though. Simply run the oven at a high temperature for about 10 minutes. This ensures any tiny bits of residual moisture from the cleaning process evaporate completely before you slide in your first meal.
Keeping that sparkling finish doesn’t have to be a chore. If you spill something whilst cooking, try to wipe it up as soon as the oven is cool enough to touch but still slightly warm. This stops the food from baking on and turning into hard carbon, which is much tougher to remove later. Regular maintenance like this, combined with a professional deep clean, genuinely extends the lifespan of your heating elements and fan by preventing them from overworking.
Daily Habits for a Cleaner Cooker
Small changes make a big difference to the longevity of the clean. I always recommend using roasting bags or lids on your pans to minimise grease splatter on the internal walls. It’s also a good habit to slide the racks out once a month and give them a quick wash in the sink with standard washing-up liquid. This keeps on top of light grease before it has a chance to build up and smoke.
Scheduling Your Next Professional Clean
Most households I visit find that a 6-to-12-month cleaning cycle is the perfect sweet spot for keeping an appliance in top condition. If you start noticing smoke when you turn the grill on, or if lingering smells from last Sunday’s roast won’t go away, it’s a clear sign you’re due for another visit. Knowing how to prepare for a professional oven clean makes these regular appointments a breeze and ensures your kitchen remains the heart of the home. Ready for a fresh start? Book your professional oven clean today.
Enjoy a Sparkling Oven with Zero Stress
Taking a few moments to understand how to prepare for a professional oven clean ensures that my visit is as efficient as possible. By clearing a small workspace and ensuring the appliance is cool, you allow me to focus entirely on the meticulous restoration of your cooker. From the deep dip-tank treatment of your racks to the final exterior polish, the result is an appliance that looks and performs like new.
I use only eco-friendly, non-caustic solutions that are safe for your family and pets. As a fully certified and insured local specialist, I take pride in delivering these high standards across Ruislip, Watford, Richmond, and Greater London. I’m completely unfazed by even the most neglected ovens, and I’m always happy to share tips to help you keep things tidy between my visits.
Ready to transform your kitchen? Get a Quote for Your Professional Oven Clean in London and let me handle the hard work for you. You’re only a few steps away from a kitchen that feels fresh and a cooker you’ll be proud to use again.
Frequently Asked Questions
How long does a professional oven clean take?
A standard single oven typically takes between 1.5 and 2 hours, whilst a double oven or a larger range cooker can take up to 3 or 4 hours to restore completely. The exact duration depends on the size of your appliance and the level of carbon build-up I need to tackle. I always work meticulously to ensure every internal component is spotless, so I never rush the job.
Do I need to turn the oven on before the cleaner arrives?
No, please ensure your oven is completely cold before I arrive at your home. Part of knowing how to prepare for a professional oven clean is making sure the appliance is safe to handle and work on. I use specialist, non-caustic solutions that are designed to work most effectively on cool enamel surfaces. If the oven is still hot from use, it can actually make the cleaning process less efficient.
Can I use my oven immediately after it has been professionally cleaned?
Yes, you can use your oven as soon as I have finished the reassembly and final inspection. Because I use eco-friendly, non-caustic products, there are no lingering chemical fumes that could affect the taste of your food. I simply recommend a quick “First Heat” for 10 minutes at a high temperature to evaporate any remaining moisture. This means you don’t have to worry about planning your meals around my visit.
Do you need to use my kitchen sink during the process?
I will need to use your kitchen sink briefly during the final stages of the clean to rinse off some of the components. Most of the heavy lifting happens in my van’s heated dip-tank, but a final rinse in the sink ensures every rack and panel is perfectly clean before I put them back. I always take great care to leave your sink exactly as I found it, without any mess or residue.